You may already have the VPN client installed. To check, click on the Windows icon and look for "Pulse Secure."
Requirements
You will need administrative rights/privileges for the program installed on your machine. Consult your Local IT Support Provider if you do not have admin access to your computer.
Download the Program
- Go to the Pulse Secure download page
- Download the version of Pulse Secure for your operating system - see the FAQ for supported operating systems
Installation
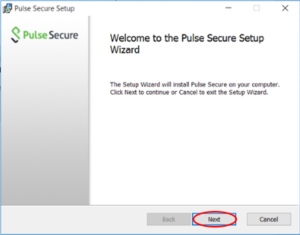
Open the client installer file then click Run at the prompt.Click Next.
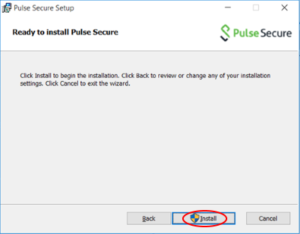
At the "Ready to install Pulse Secure" screen, click Install. Click Yes to the User Access Control message.
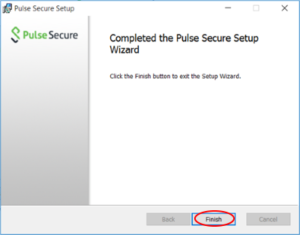
At the end of installation, a window will appear on top of the screen below. Simply wait until the window disappears, then click Finish.
Set Up Your Connection
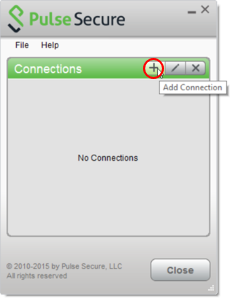
After the software is installed, set up your VPN connection.Open Pulse Secure - you can go to Start , then type Pulse Secure. You can right-click the icon and click "Pin to Start" or "Pin to Taskbar."
Click the + to add a new connection.
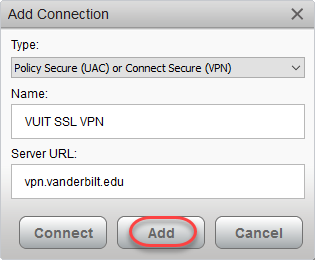
Enter the information below on the "Add Connection" prompt then click Add.
Type: Policy Secure (UAC) or Connect Secure (VPN)
Name: VUIT SSL VPN
Server URL: vpn.vanderbilt.edu
Connect to VPN
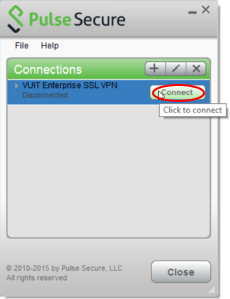
Click Connect on your new connection.
The VPN access policy will display next. Read the policy and click Proceed.

Enter your VUnetID and ePassword at the prompt. Click Connect. It is recommended not to check the "Save settings" option for security reasons.
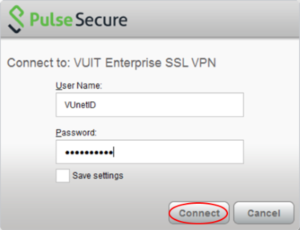
Tap "Approve" on the push notification on your smartphone.
Hardware token users: In the "Password" field, enter your password, comma, then the passcode.
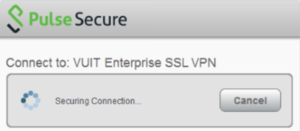
It will take a few seconds to connect.
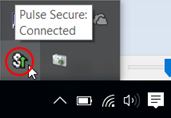
You should be connected. To verify, check for the Pulse Secure icon in the system tray.
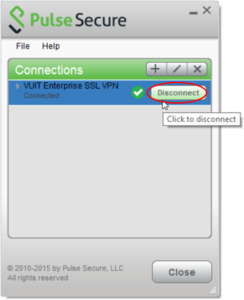
To disconnect from Pulse Secure, click on the application window and click Disconnect.
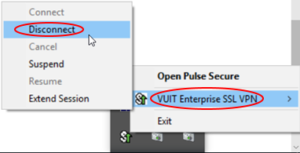
Alternately, right-click the system tray icon, select the VPN connection, and click Disconnect.
Disabling Pulse Secure Autostart
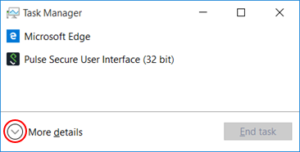
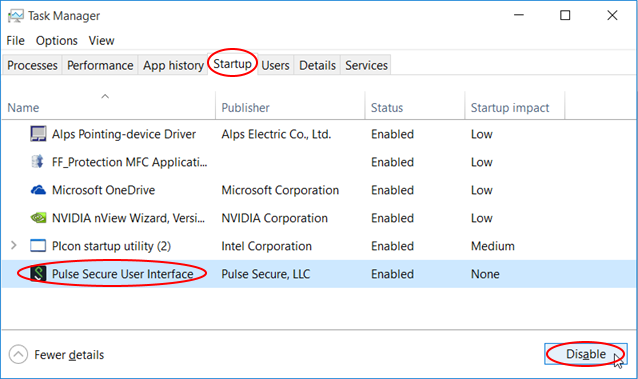
Go to Start , then type "Task Manager."
Click on More Details if you see the screen below.
Click the Startup tab. Click on Pulse Secure Desktop Client, then click the Disable button.
Click X to exit.