Configuration: vuNet - Win 8
How to Configure vuNet with Windows 8 (Vanderbilt Domain Setup)
- Make sure your wireless network card is enabled.
- Make sure latest software drivers are used for the wireless network card. Many issues are resolved by using the latest manufacturer's drivers!!!
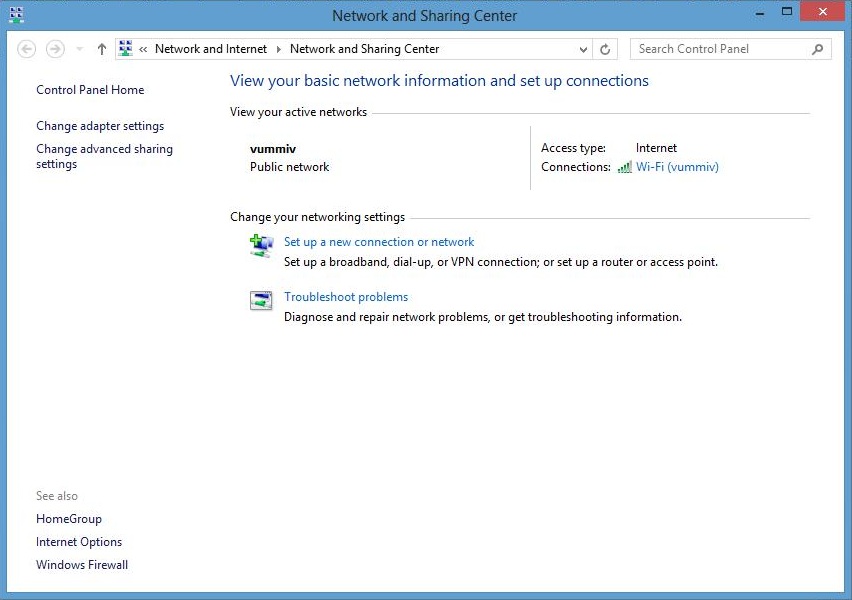
- Right click on the wireless signal indicator and select "Open Network and Sharing Center


- On the Network and Sharing Center window that pops up, select "Set up a new connection or network"
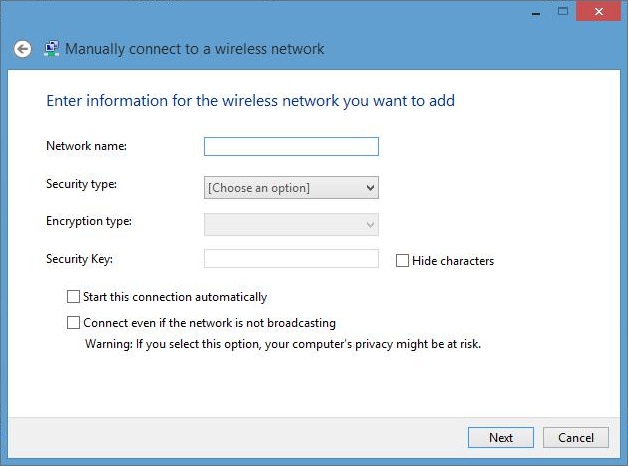
- Select "Manually Connect to a wireless network" on the screen that pops up:

- You will get the screen below in which to enter the wireless network information:
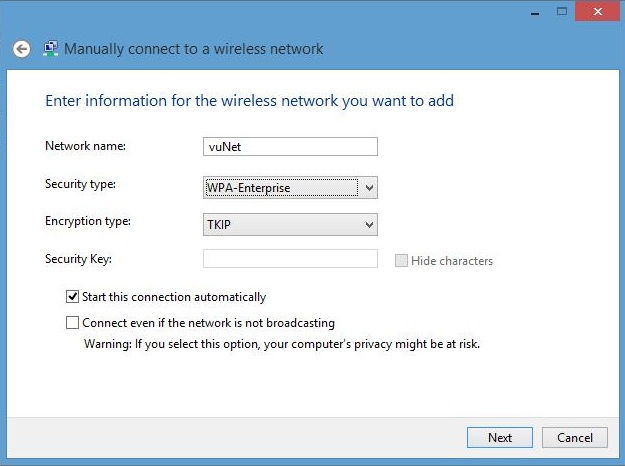
- For the Network name, enter vuNet (NOTE: name is case sensitive)
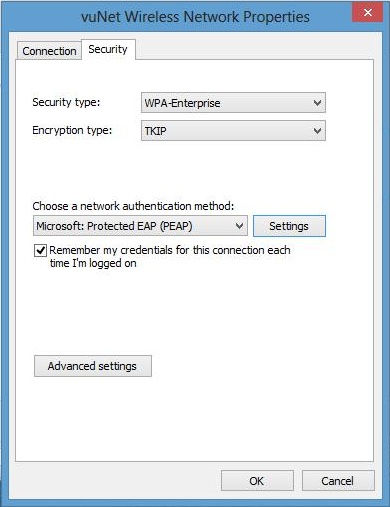
- For Security type, select WPA-Enterprise from the drop down
- For Encryption type, select TKIP from the drop down
- Make sure the "Start the conection automatically" checkbox is checked
- Please see example below:
- Click on Next on the bottom right of the window after verifying that the wireless network information is entered correctly
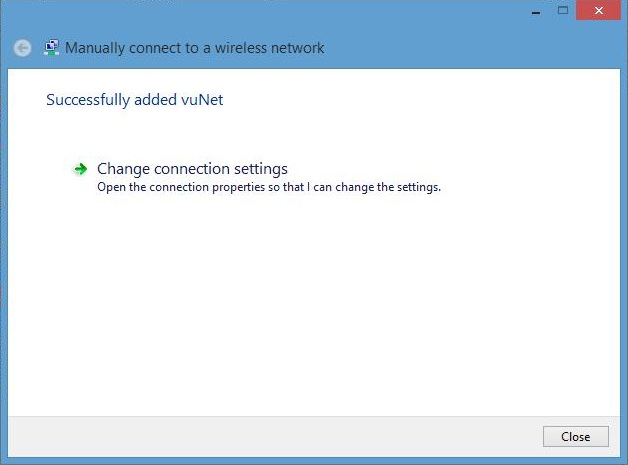
- Once you click Next, you will get the screen below that you have successfully added vuNet:
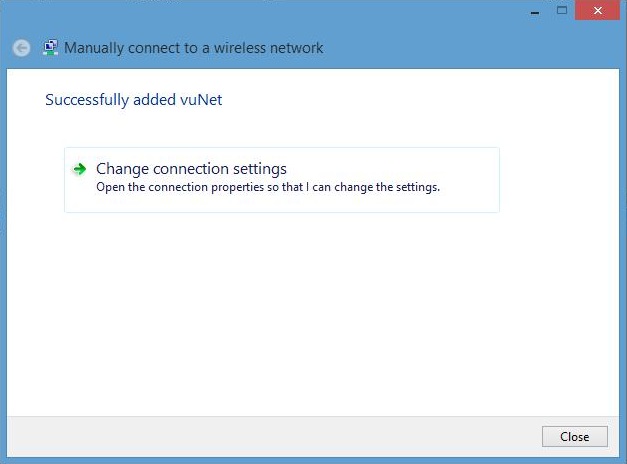
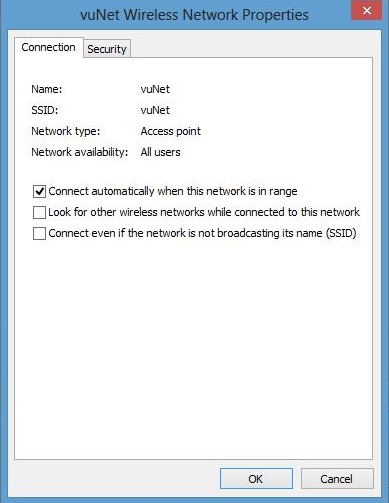
- Click on "Change connection settings" which opens the vuNet Wireless Network Properties window
- Make sure that the checkbox "Connect automatically when this network is in range" is checked under the Connection tab
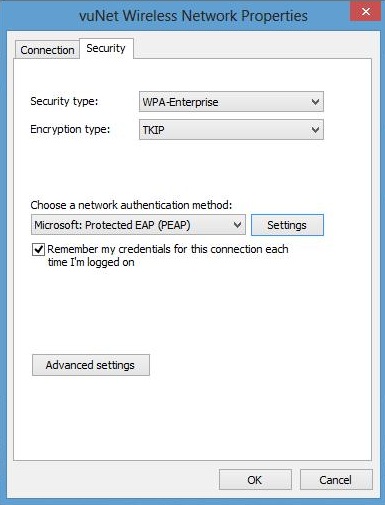
- Select the Security tab and click on the Settings button
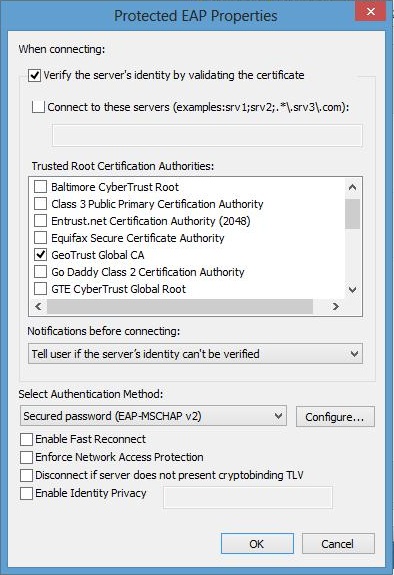
- Clicking on the Settings button opens up the Protected EAP Properties window shown below:

- Make sure that the Verify the server's indentity by validating the certificate checkbox is checked
- Under Trusted Root Certificate Authorities, scroll down and check GeoTrust Global CA
- Under Notifications before connecting, make sure that "Tell user if the server's identity can't be verified" is selected from the drop down list
- Make sure that the Enable Fast Reconnect checkbox is unchecked
- The screen below shows the correct settings:
- Click on Configure button to open up the EAP MSCHAPv2 Properties window shown below:
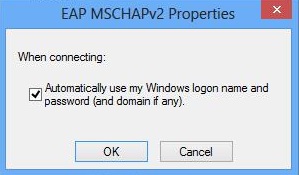
- Make sure that the checkbox that says "Automatically use my Windows Logon name and password (and domain if any) is checked as shown above
- Click"OK" to close the EAP MSCHAPv2 Properties window.
- Click on "OK" to close the Protected EAP Properties window
- Once you click on "OK", you will be brought back to the vuNet Wireless Network Properties window
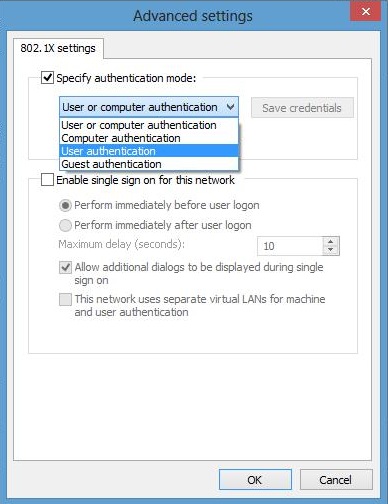
- Click on the Advanced settings button towards the bottom left of the window
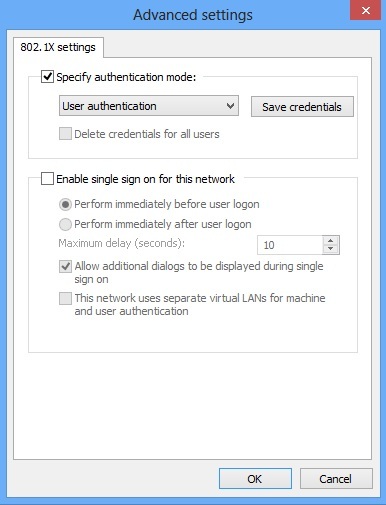
- Check the Specify authentication mode checkbox under the 802.11x setting tab

- Select User authentication from the drop down list and click "OK" to close the Advanced settings window
- Click the "Close" button on the bottom right to exit setup
- You will now be connected to vuNet
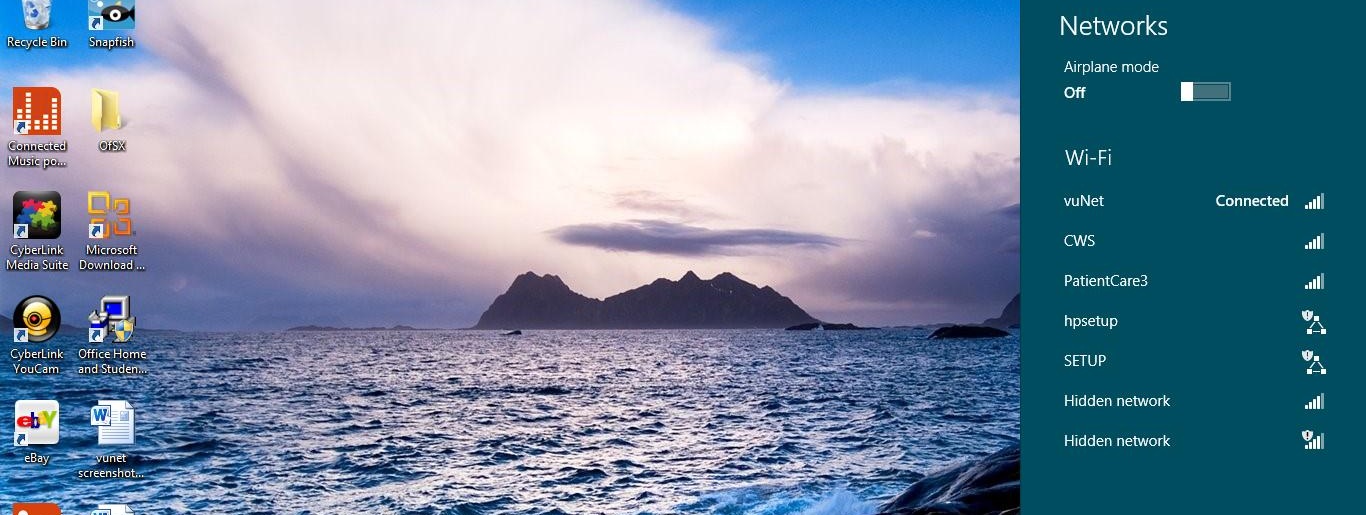
- Once connected, you can confirm connectivity by left clicking on the wireless signal indicator which brings up the screen below with "Connected" right next to vuNet
How to Configure vuNet with Windows 8 (non-Domain Setup)
- Make sure your wireless network card is enabled.
- Make sure latest software drivers are used for the wireless network card. Many issues are resolved by using latest manufacturer's drivers!!!
- Right click on the wireless signal indicator and select "Open Network and Sharing Center"
- On the Network and Sharing Center window that pops up, select "Set up a new connection or network"
- Select "Manually Connect to a wireless network" on the screen that pops up:
- You will get the screen below in which to enter the wireless network information:
- For the Network name, enter vuNet (NOTE: name is case sensitive)
- For Security type, select WPA-Enterprise from the drop down
- For Encryption type, select TKIP from the drop down
- Make sure the "Start the conection automatically" checkbox is checked
- Please see example below:
- Click on Next on the bottom right of the window after verifying that the wireless network information is entered correctly
- Once you click Next, you will get the screen below that you have successfully added vuNet:
- Click on "Change connection settings" which opens the vuNet Wireless Network Properties window
- Make sure that the checkbox "Connect automatically when this network is in range" is checked under the Connection tab
- Select the Security tab and click on the Settings button
- Clicking on the Settings button opens up the Protected EAP Properties window shown below:
- Make sure that the Verify the server's indentity by validating the certificate checkbox is checked
- Under Trusted Root Certificate Authorities, scroll down and check GeoTrust Global CA
- Under Notifications before connecting, make sure that "Tell user if the server's identity can't be verified" is selected from the drop down list
- Make sure that the Enable Fast Reconnect checkbox is unchecked
- The screen below shows the correct settings:
- Click on "OK" to close the Protected EAP Properties window
- Once you click on "OK", you will be brought back to the vuNet Wireless Network Properties window
- Click on the Advanced settings button towards the bottom left of the window
- Check the Specify authentication mode checkbox under the 802.11x setting tab
- Select User authentication from the drop down list and click "OK" to close the Advanced settings window
- Click the "Close" button on the bottom right to exit setup
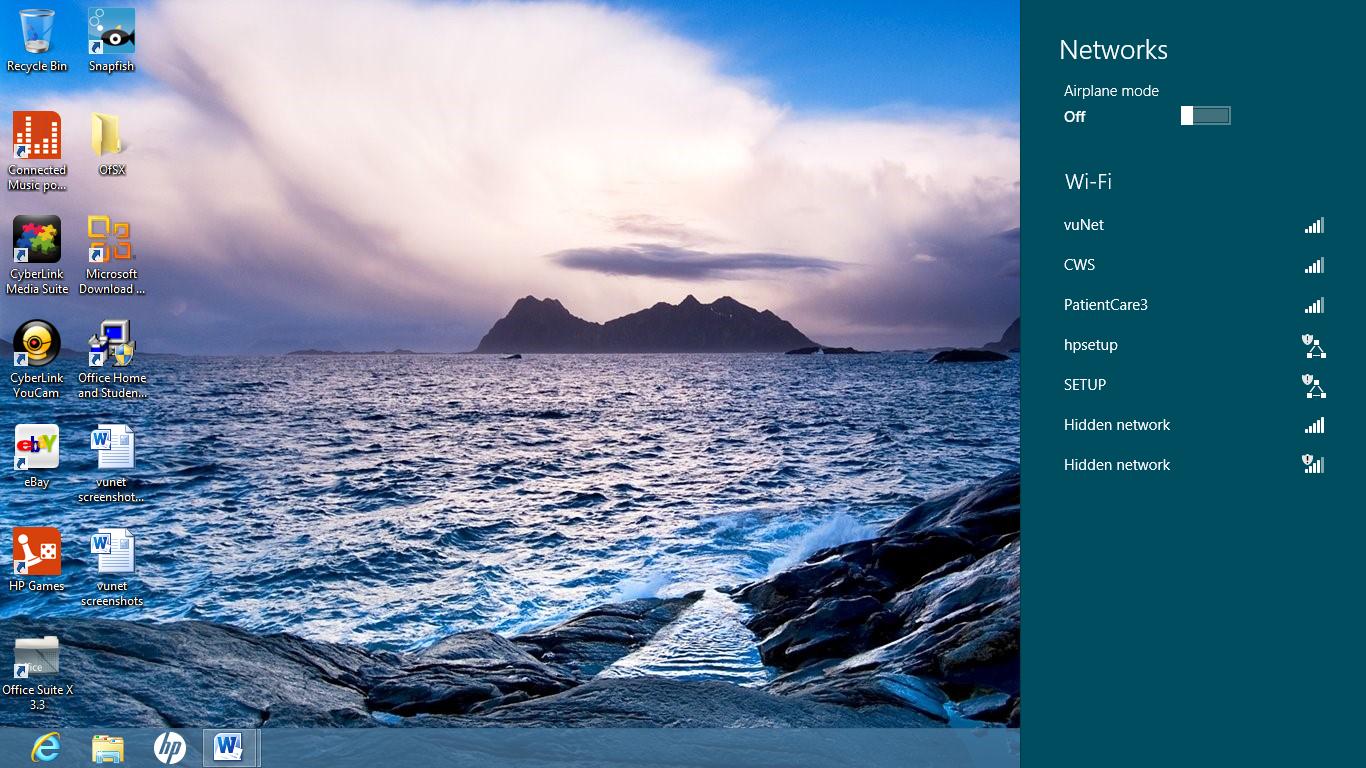
- Left click on the wireless signal indicator from the task bar to bring up the list of available networks
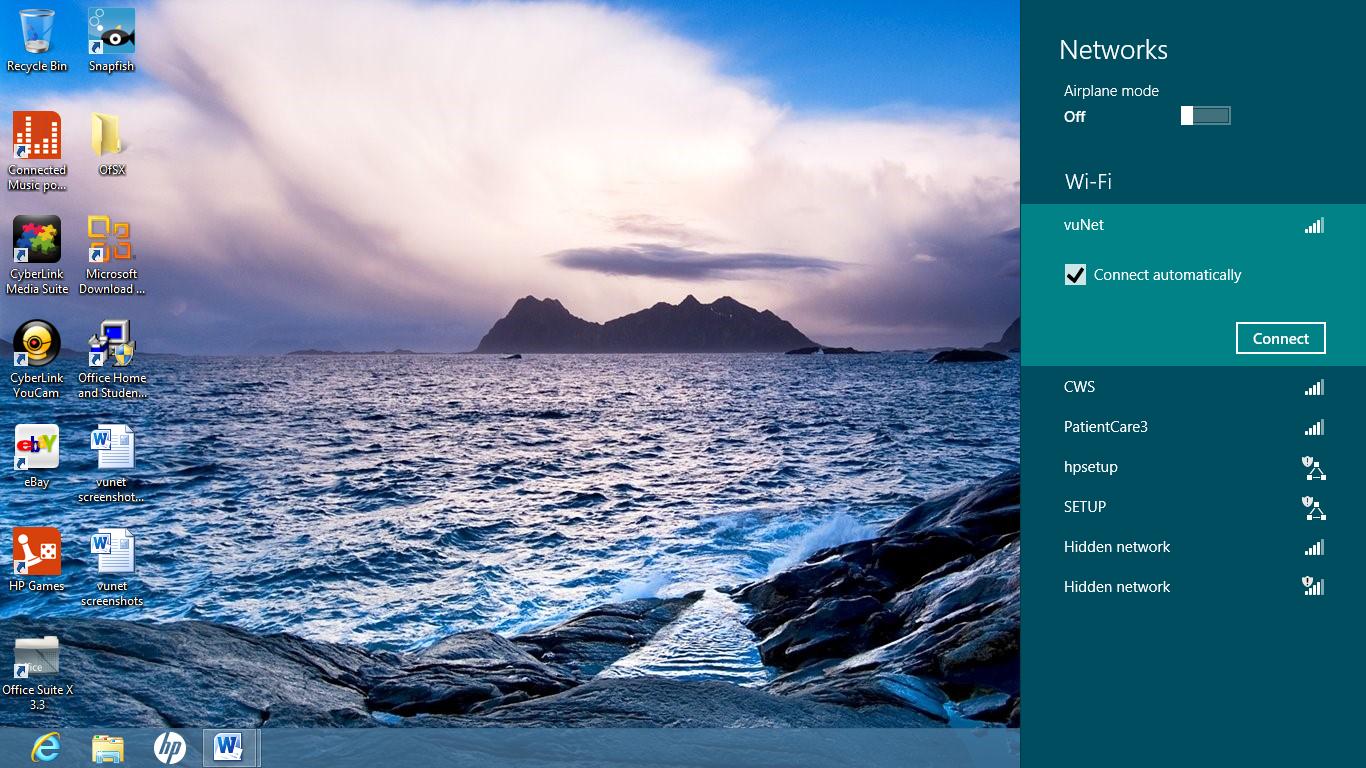
- Right click on vuNet , make sure the Connect automatically checkbox is checked and click on Connect
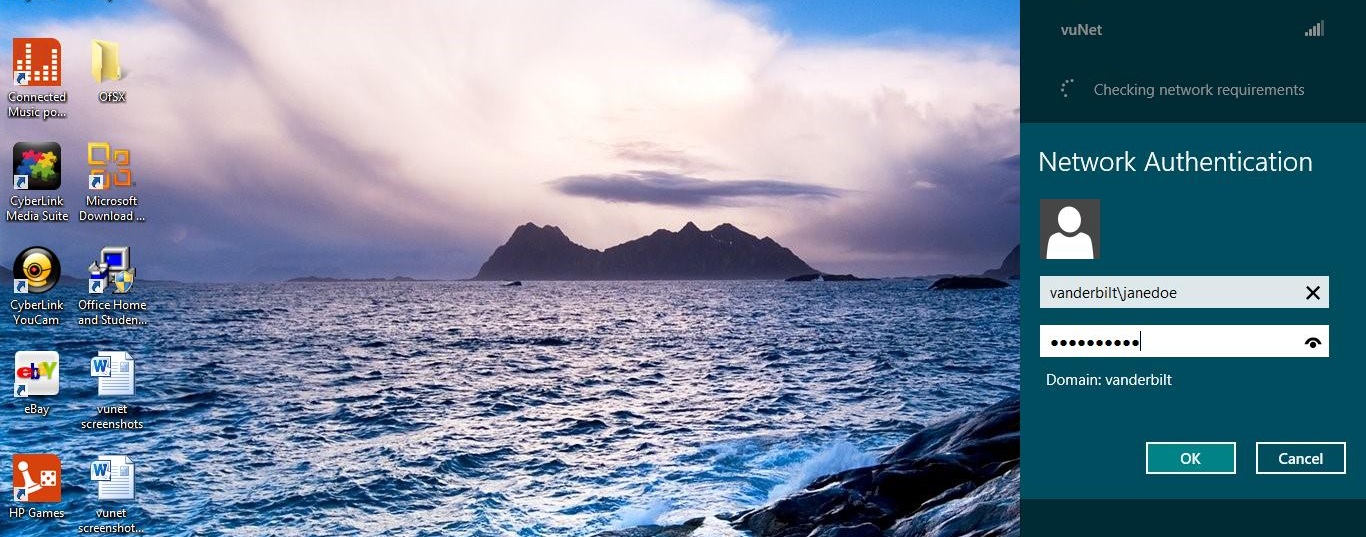
- You will be prompted for Network Authentication where you have to enter your vuNetID and ePassword
Example: vanderbilt\janedoe
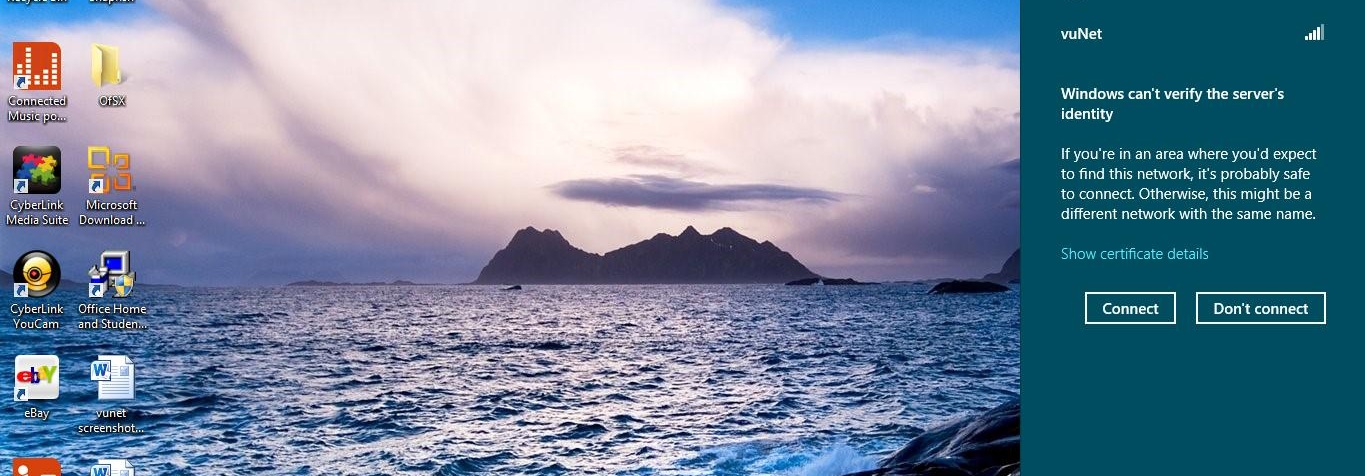
- Click on the Connect button if you get the warning message that "Windows can't verify the server's identity"
- You will get a message as shown below that says "Verifying and connecting"

- Once connected, vuNet will have Connected right next to it:
- You are now connected to the vuNet wireless network
NOTES:
- Several of these Windows 8/8.1 laptops are coming with some kind of internal security/lock which is preventing the Vanderbilt certificates from installing. You will need unlock you antivirus to allow xPressConnect to run.
- Some Windows 8 computers that have been upgraded to Windows 8.1 have been unable to connect to the VU wi-fi networks. Of those, some have been able to connect after downgrading their wireless card drivers to the Windows 7 version. These drivers can be found on the website of the computer's manufacturer.